
In this post, I want to showcase my Victrix Greek Light Cavalry for my Macedonian army. After my posts about the Phalangites, Hypaspists, archers, and other skirmishers, it is time to start with the cavalry sections.
The kit
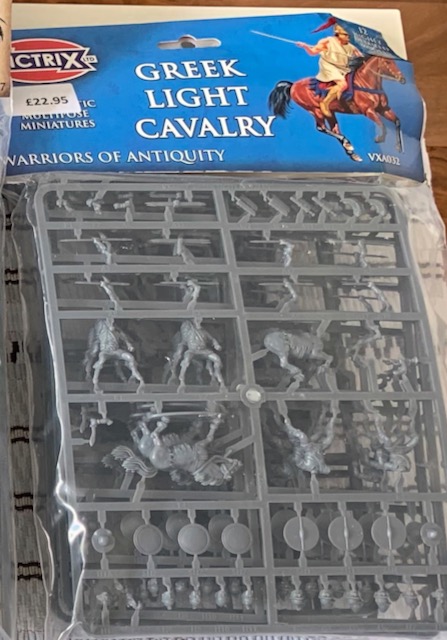
The Victrix Greek Light Cavalry is an all-plastic kit. The level of detail is great, and the sprues offer enough bits to build 12 miniatures. As always, the kit is easy to build, and mold lines are not an issue.
I base all my cavalry units in pairs of two. But I strongly recommend doing that after painting them up. Otherwise, it can become really cumbersome to reach some spots with the brush. For the Victrix Greek Light Cavalry, I used 40mm square bases from Victrix.
How to Paint
- Priming
As usual the miniatures were primed using Vallejo primer white.
- Base colors
Skin: Vallejo Flat Flesh (955)
Tunics:
Army Painter Daemonic Yellow, Army Painter Hydra Turquoise, Army Painter Goblin Green, Army Painter Skeleton Bone, Vallejo Carmine Red (908), and Vallejo Panzer Aces Canvas (314).
Leather: Army Painter Leather Brown
Helmets: Vallejo Brass (801)
All wooden parts: Vallejo Panzer Aces Old Wood (310)
All metal parts: Vallejo Gunmetal (863)
Horses:
Vallejo Leather Brown (871), Vallejo Beige Brown (875), Vallejo Brown Sand (876), Army Painter Leather Brown, Army Painter Tanned Flesh, Army Painter Matt Black. I used the last two for manes and tails. - Decals
In the third step, I applied decals to the models. Unfortunately, I can’t remember anymore which one I used. But they are from Little Big Men. I use their stuff in most cases because they are rather easy to apply.
- Shading
I used Army Painter Quickshade’s soft tone to shade the army. It is messy, but it works. Just keep in mind to use some matt varnish in a later step to fight the glossy look.
- Basing
After sanding the base using watered-down PVA and grit, I painted everything in Vallejo Tan Earth (874). If you want to achieve more durability, I strongly recommend adding another coat of watered-down PVA to the grit before applying the base color.
Anyway, after base coating the grit, I dry brushed the whole piece using Vallejo Iraqui Sand (819), followed by a lighter drybrush of Vallejo Pale Sand (837). I finished the bases by adding some grass tufts. Nothing fancy, but it looks nice and adds to the impression of an army marching through an arid environment. - Sealing
In the last step, I sealed the modes using Army Painter Matt varnish anti-shine. If you don’t wash your miniatures, you will have no problems with glossy figures. Nonetheless, I strongly recommend using some varnish to protect your miniatures.
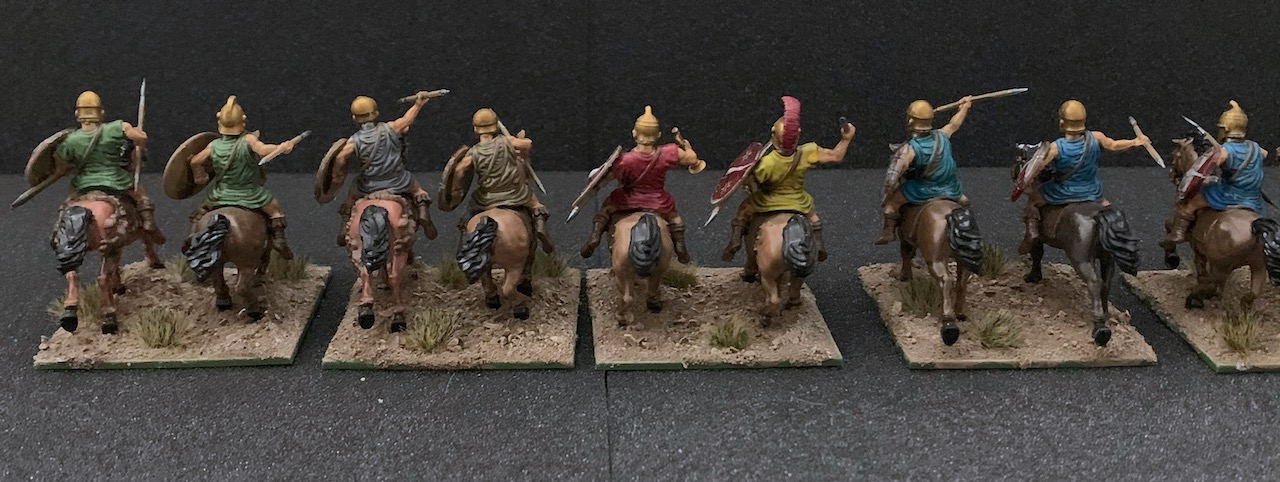
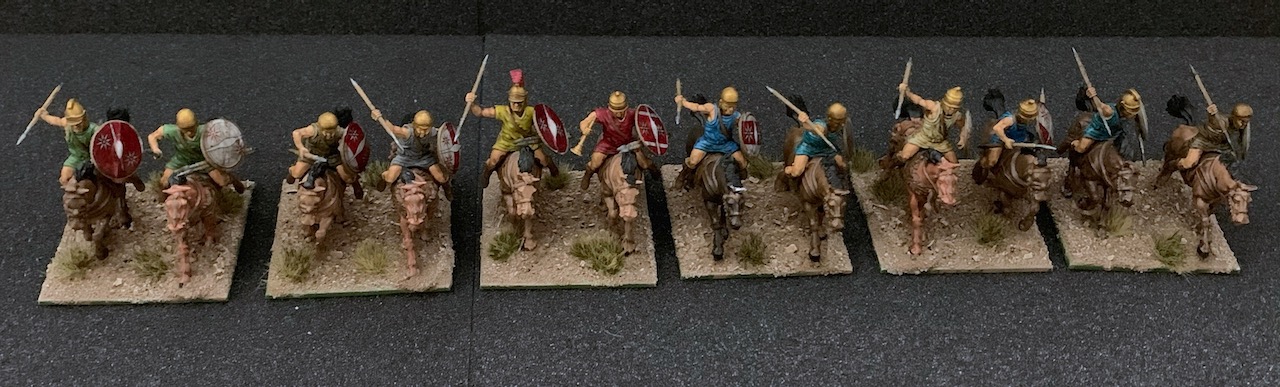
THE FINISHED MODELs


Verdict
The Victrix Greek Light Cavalry is a great kit and a great addition to any ancient collection. The figures are easy to build, a joy to paint, and they look lovely on the table. They are reasonably priced, and I can strongly recommend them.
In the next post of this series, I will showcase my heavy cavalry choice. So stay tuned, and as always, happy wargaming!
1 thought on “Victrix Greek Light Cavalry”