
In this review, I want to showcase my Marder III Ausf. H Tank Destroyer from Warlord Games. As a bonus, I added an easy to follow painting tutorial.
History
The Marder, german for marten, was a German tank destroyer during World War II. It was in service on all fronts from 1942 until the end of the war in 1945.
The Marder III was kind of a makeshift tank, using an open-topped fighting compartment on top of a Czech made Panzer 38(t) chassis. I like the Marder III because it looks like someone welded a way to big gun on a way to small tank. The Marder might not be as iconic as the famous StuG series, but nonetheless it is a lovely tank.
The kit
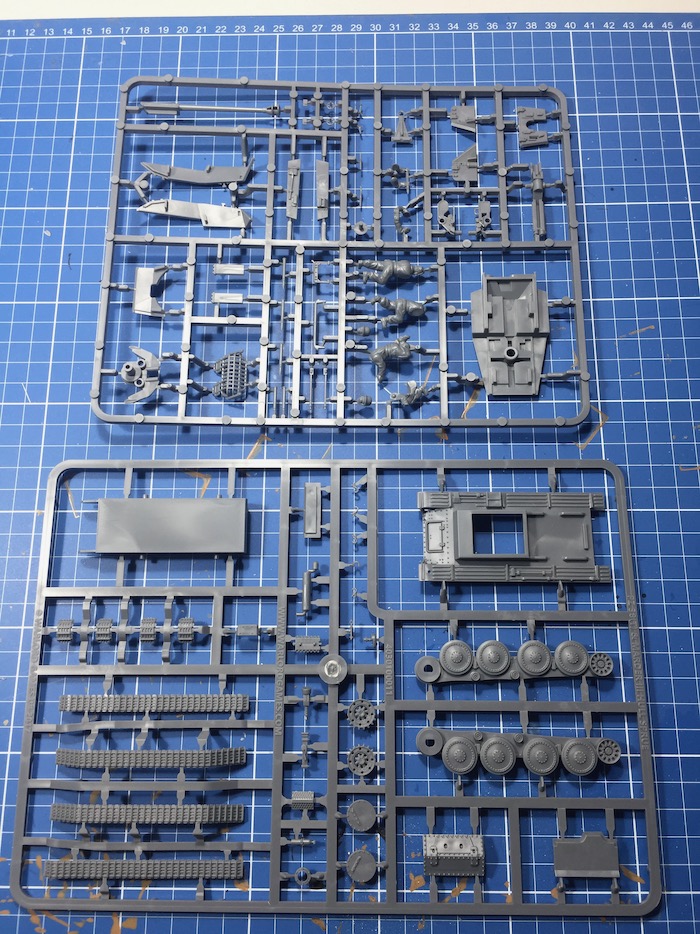
The kit by Warlord Games comes with two sprues, a unit card for Bolt Action, Decals and the usual Bolt Action vehicles marker for smoke, etc. In addition, the kit also includes three crewmen. It is an all-plastic kit, which made assembly very easy. Personally, I am a big fan of plastic kits over the metal ones by Warlord.

How to Paint the Marder III FROM WARLORD
Time needed: 3 hours
- Priming
In the first step, I primed the Marder white, using Vallejo Primer. I applied the primer with a brush.
- Preparing the kit for weathering effects
The finished Marder III should look used, so I applied some weathering techniques. Because of that, I painted the whole model with Vallejo Hull Red (985). After chipping the base color, this first layer will shine through. So basically, we will create the illusion of small varnish cracks due to heavy use.
- Appling the chipping medium.
After the Hull Red dried up, I applied Vallejo Chipping Medium. This will basically provide the chipping effect.
- Painting the Marder
Now it is time to apply the base color. I painted the whole tank destroyer using Vallejo Middlestone (882). This is my go-to color for german armor. I spared out the tracks, the crewmen and any stowages.
The tracks and the boots of the crewmen were painted using Vallejo Black Grey (862). I prefer the color over deeper black. But I guess this is a highly subjective topic.
The uniforms of the crewmen and the cap of the Commander were painted in Vallejo Field Grey (830). Any skin was painted using Vallejo Basic Skin Color (815). Unfortunately, I forget in which color I painted the helmets. - Activating the chipping medium
After the base colors dried up, it was time to activate the chipping medium. I used an old toothbrush and some water. It is rather easy, just gently brush off some of the base colors and you will see the Red Hull paint beneath it.
Just be careful not to overdo it.
As a bonus, I applied Vallejo Environment Rust Texture to the model. Unfortunately, I pushed a little bit too hard on the Marder III. - Shading
For shading the Marder I used Army Painter Quickshade (Dark tone). I applied the shade with a brush. Overall it is kind of messy, but it works.
To improve the flow of the quick shade I sealed the tank with Army Painter Anti-Shine before. - Applying Decals
After the quick shade dried completely, which will take at least 48 hours, it was time to add the decals. The Marder III from Warlord comes with a variety of decals, which are rather easy to apply.
- Adding some dirt
To add some more character to the model, I chose to add some more Weathering effects. I used Vallejo Thick Mud (European Mud) and Vallejo Splash Mud (European Splash Mud). As always the Vallejo stuff works great. I added the mud mostly on the tracks and the lower parts of the tank.
- Sealing the whole piece
Finally, it was time to seal the whole Marder. I used Army Painter Anti-Shine for this task.
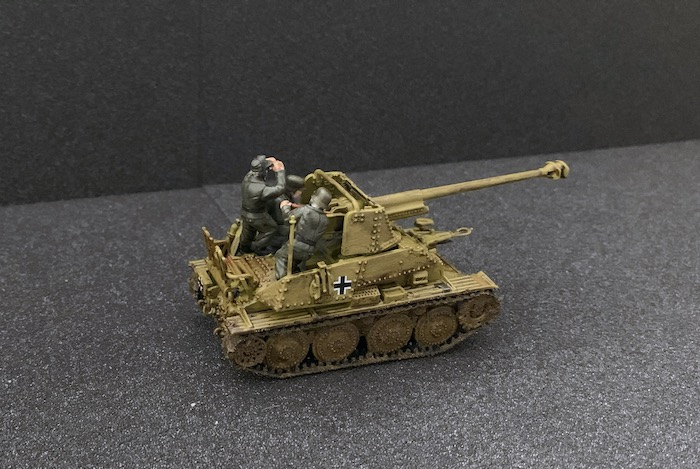
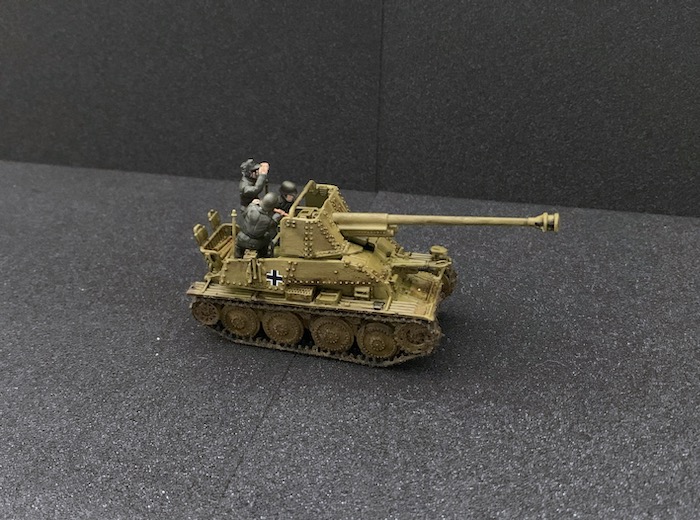
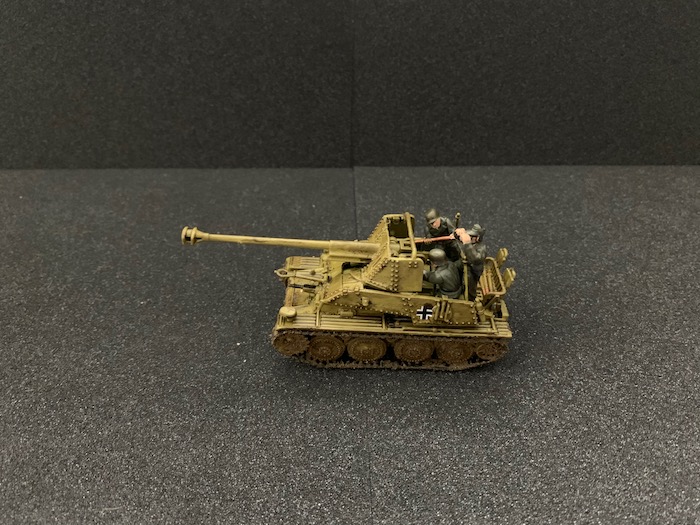
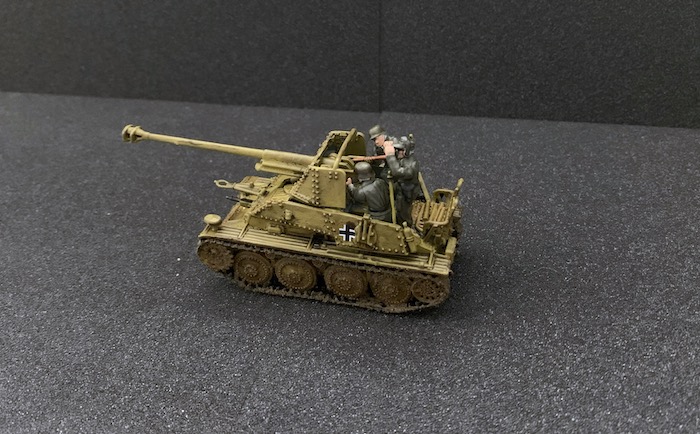
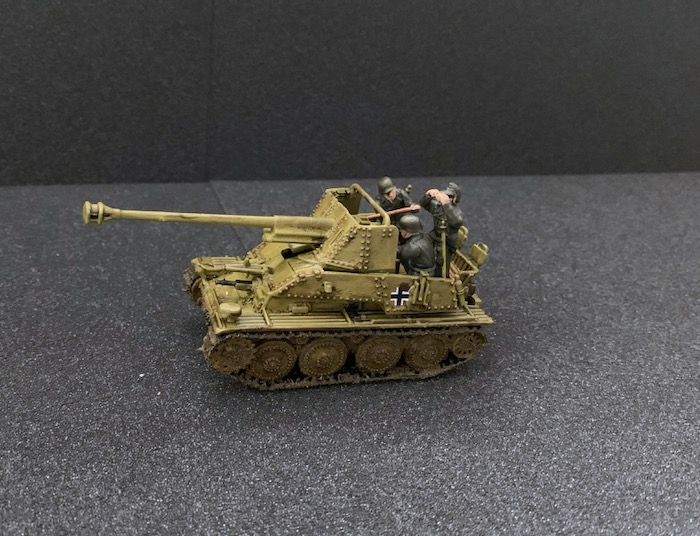
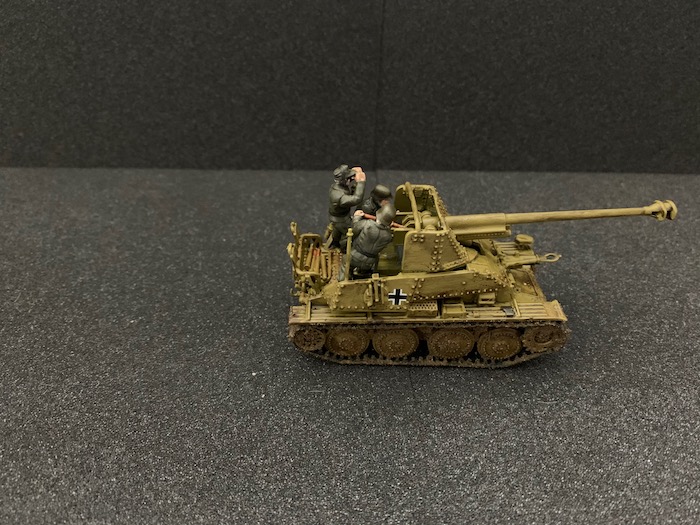
THE FINISHED Marder III from Warlord Games

Verdict
The Marder III from Warlord Games is a lovely kit. The tank destroyer itself is a must-have for every wargamer. You can field the model with almost every German Army List. The Marder might not be as sturdy as the big German cats, put strategically place in an ambush he will be worth his points. I like to use the model for Bolt Action and Chain of Command.
If you have any questions or comments, please put them down below in the comments. And as always, happy wargaming!