
In this
To add more variety to the gaming table, this tutorial will showcase two different kinds of terrain pieces. The big ones representing a small forest, while the small ones act as a single tree. As a result, you will gain more flexibility when setting up your gaming table.
Stuff you need:
- styrofoam
- CDs / DVDs
- some washers
- cardboard
- watered-down PVA (50:50 mix)
- sand & rocks
- hot glue (optional)
- PVA
- trees, tufts and other materials for building scenery
- model trees
- different kinds of flock
- winter snow
- acrylic paints (dark brown, grey, tan, sand)
- a spray bottle
- a sharp knife
- some brushes
Tutorial: How to build a winter forest for wargaming
Time needed: 2 hours and 30 minutes
Please keep in mind, that the time needed is just a rough estimation without any drying time included.
- Building the big bases aka small forests
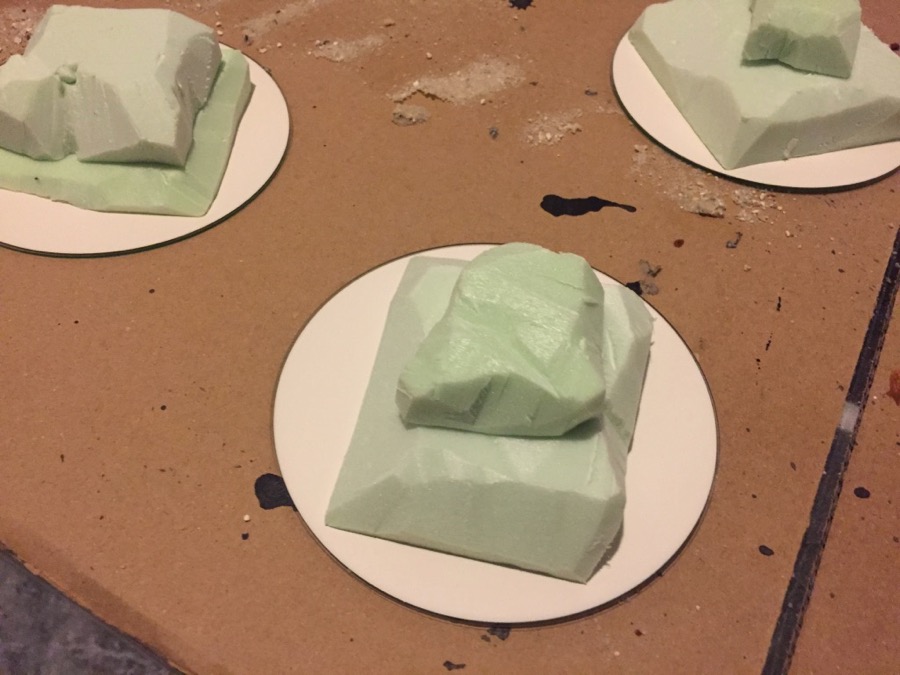
In the first step, you have to build the bases of your terrain pieces. For the larger ones, I used some old CDs. But you can also use styrofoam or MDF. It really doesn’t matter.
Now I cut some styrofoam into small pieces and glued them to the bases. This will be the foundation. Please make sure that you cut the corners of your styrofoam pieces into a more natural shape. Take a look at the pictures and you will get an idea.
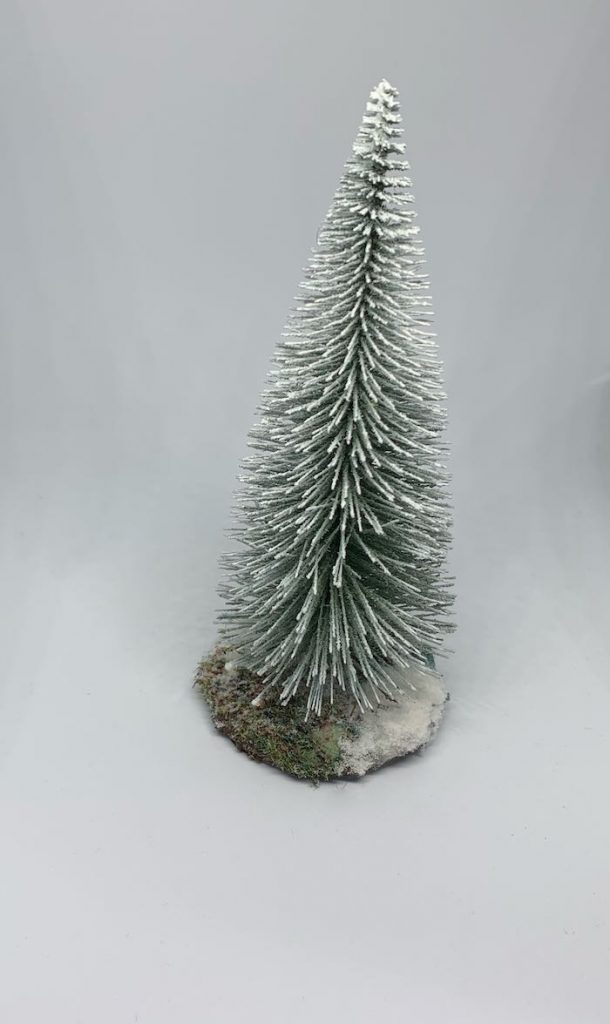
- Building the small bases aka a single tree
For the small ones, I glued some washers to round pieces of cardboard. The washer adds some weight to your terrain piece and prevents the trees from falling over.
- Adding the trees
In this step, we add the trees to the bases. I used hot glue for this task, but PVA will work too. For the small bases, I added one tree per base. For the big ones up to three trees per base. But keep in mind, add as many trees as you like. There is no right or wrong in that step. Again I used my glue gun for the task.
- Preparing the bases
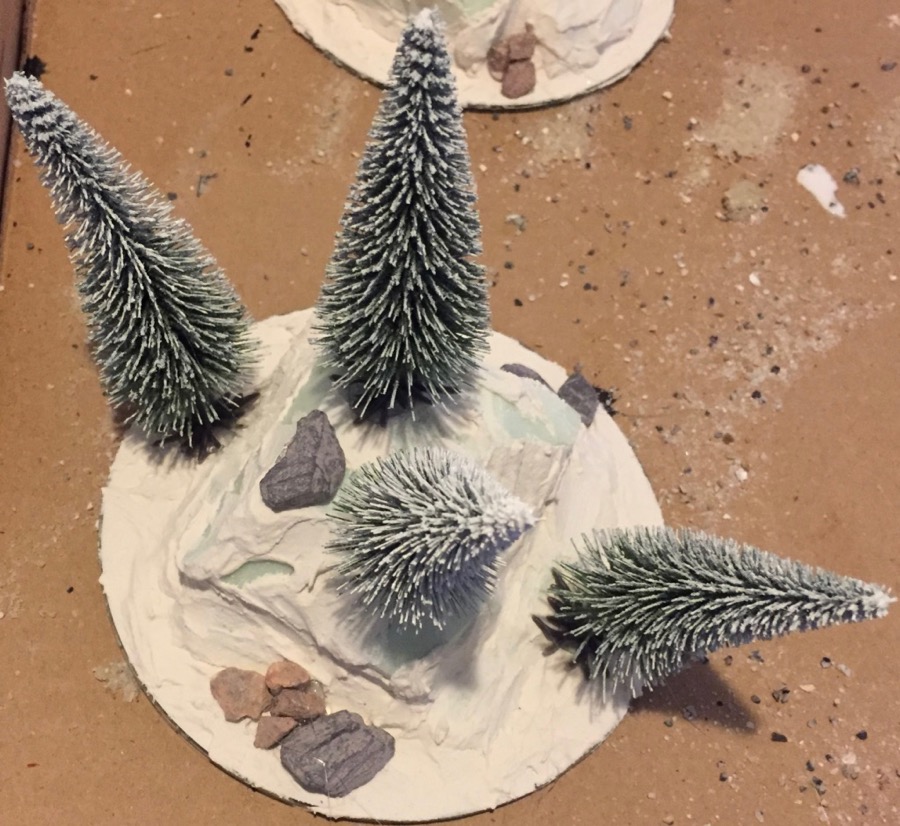
In the fourth step, it is strongly advisable to add filler to the bases. This will fill smaller holes and gaps but also gives the whole base a more consistent look. Just make sure, that you don’t add any filler to the trees. Or if some kind of mishap happens, remove the filler from the trees before it dries up.
- Adding some structure
Directly after applying the filler, it is time to add small stones and other elements to the bases. Just push them gently into the filler, so that they will stick later. Now, wait until
the filler dries up completely . - Adding even more structure
In the sixth step, it is time to add some sand to the bases. Apply watered-down PVA to the spots, where the sand should stick later. Be careful not to apply it to any stones or trees. Because of that, I recommend applying the watered-down PVA with a medium-sized brush and not with a spray bottle. After that, apply an appropriate amount of sand to the base.
If you want to achieve a better result you should apply sand of different grain sizes. Starting with the grainy one and ending with the finest sand. You will receive a much more realistic look. - Applying the base coat
Before we start to paint the terrain pieces I highly advise to apply one or two layers of watered-down PVA to seal the sand.
It is best to use a spray bottle for this task because a brush could loosen the sand if you are not careful. The watered-down PVA will dry crystal clear, so don’t be afraid if you spray on the trees too.
After the PVA mixture dried up completely it is time to add some paint. I used brown acrylic paint, thinned down with some water. Besides that, I also added a small amount of PVA to the paint. This will give an additional level of sealing. - Painting the stones
In the next step, I painted the bigger rocks grey. As always, I diluted the paint with water. In this step, you don’t need to add PVA to the mix. If your rocks don’t stick already, adding PVA to the paint won’t fix the problem anyway.
- Dry-brushing
Now it is time to dry brush the whole terrain piece. Use brownish or sand or tan colors, which are lighter than your base coat. In most cases, it is far better to apply two or three different layers of dry brush than only one with a big contrast in colors. If you are fancy, dry brush the rocks in a lighter grayish color too. But if you are in a rush, just skip this step and dry brush the whole piece using the earth tones mentioned before. After adding the snow it won’t make much of a difference anyway.
- Adding flock
In this step, it is time to add a variety of flock to the terrain pieces. Again I used my trusty watered down PVA mix for the job. But be careful, some kind of flock tends to bleed out, if it gets wet. So don’t put too much glue on your terrain piece. And of course, it is a good idea to spare out any kind of rocks. In this step, it is really important to use different types of flock otherwise, your terrain piece will look pretty sterile and boring. Take a look at the model railroad companies, there you can find a lot of great stuff.
- Sealing
After several hours of drying time, your pieces should be ready for sealing. Apply the watered down PVA mix using a spray bottle. This time don’t mind to spare out the rocks, because you do want to seal everything. Sometimes PVA tends to dry out a little bit shiny. If you run into this issue, you can easily fix it with a matt varnish.
- Winter is coming
Finally, we apply snow to our pieces. It works very similarly to flocking, so just spray watered down PVA onto your terrain pieces. To get the best effect, don’t apply the snow by hand. Instead, put your snow in a strainer and let it snow gently. This method is messy, but the result is much better. And do yourself a favor and apply the snow when your wife is not at home. Trust me.
- Sealing (yet again)
Yes, we are almost done. But if you want your lovely terrain pieces to last longer, don’t skip this step. So grab your spray bottle filled with watered down PVA and seal everything again. And one last word of advice: repeat this step two or three times. I know, it is kind of messy and takes a while to dry, but it is worth the hassle.


The final pieces

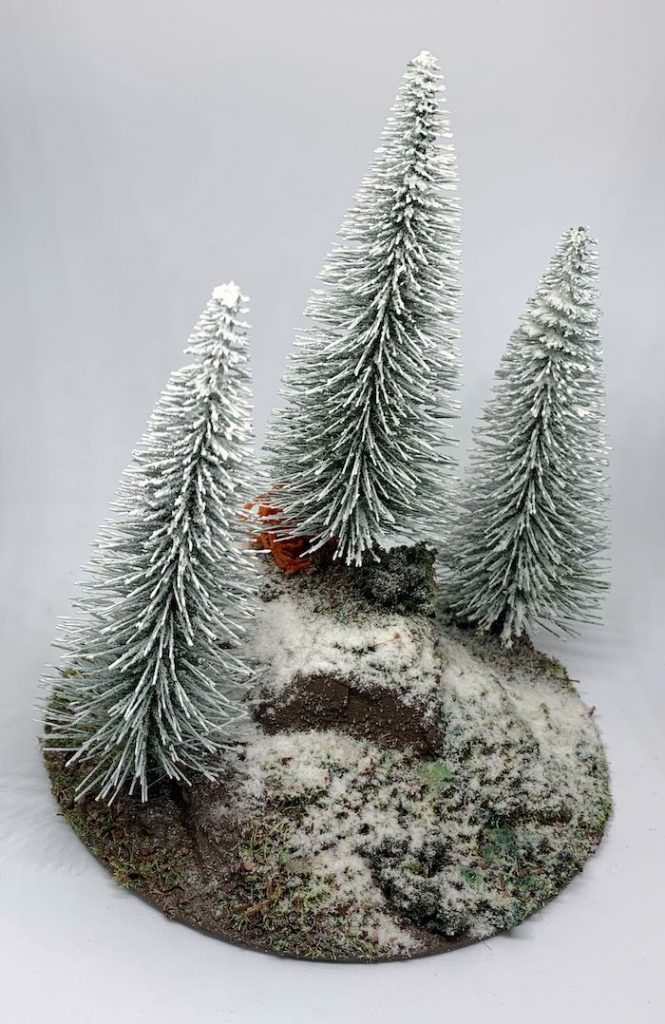


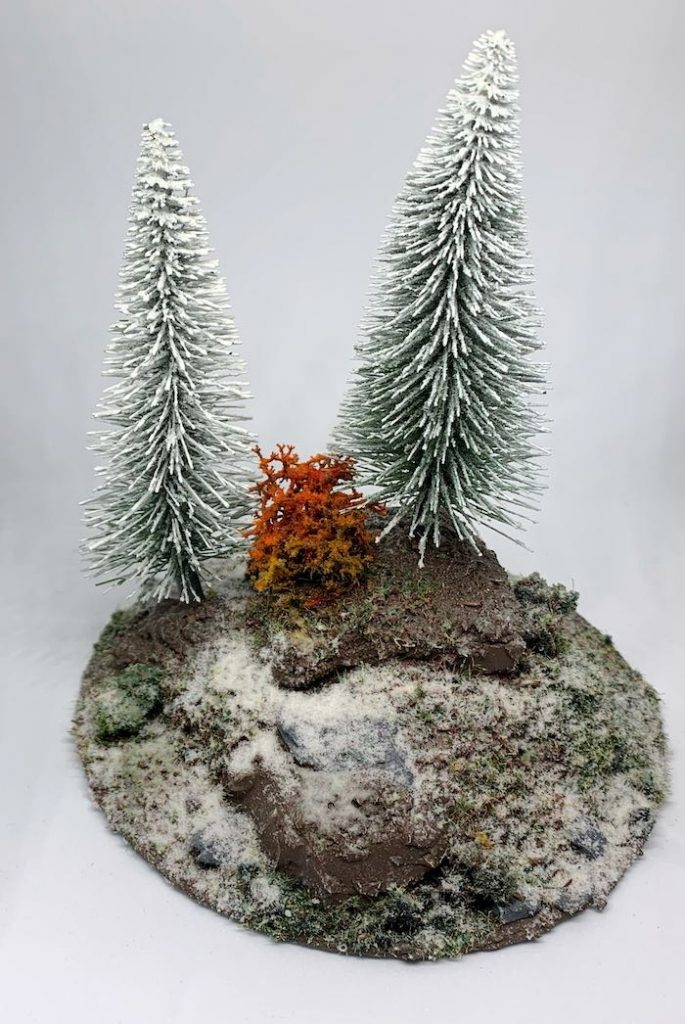


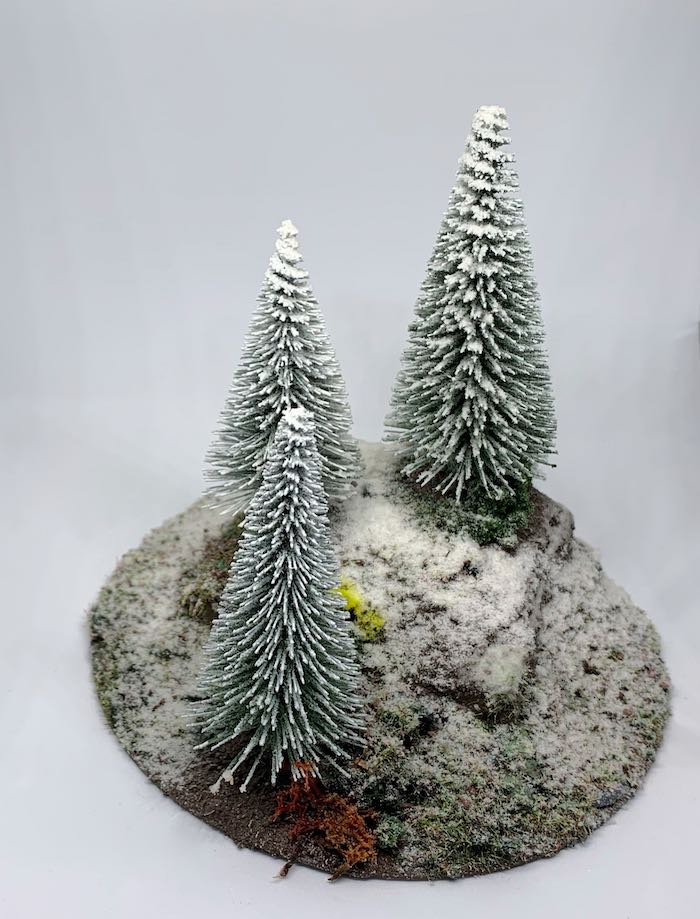

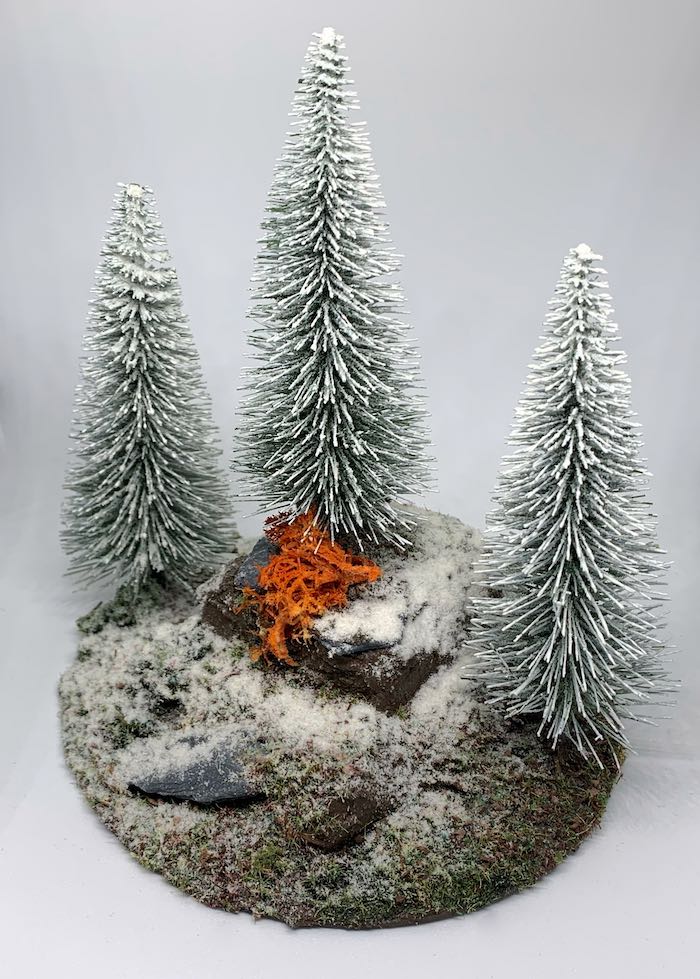
I hope you enjoyed this tutorial on how to build a winter forest for wargaming and it could prove useful to your hobby. If you have any questions, put them down in the comments. And as always, happy wargaming!