It is time for another piece of scenery. This time we are building a Meerkat den for Wargaming. I love colonial wargaming because of the nearly endless possibilities for terrain and scenery. As a result, most gaming tables for colonial wargaming look amazing. If you want to go the extra mile, you could add some special pieces to add even more flavor to your table. The Meerkat den is one of these pieces. I stumbled over the idea while reading Michaels blog. The used miniatures are the Meerkat familiars from Reapers Dark Heaven Legends series. Lovely miniatures by the way. But let’s start.
How to build a Meerkat den for wargaming
For the base take a piece of foam core, the kind which is used by architects. Make sure not to cut it straight, because this looks rather unnatural. That’s why I prefer to cut the base freehand. After that, sand the edges. Later on the table, this helps the terrain pieces to blend in.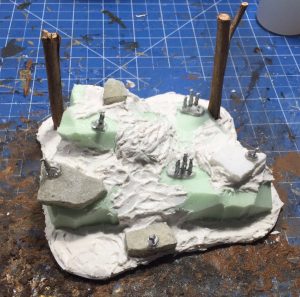
Now it is time to build the den. I used styrodur, which is a German brand name for extruded polystyrene (foam board for insulation). It is very dense, but also light and easy to handle. Usually, you can buy it at any home depot. Cut the foam board into some smaller rock like pieces and apply them to the base. I used my hot glue gun, but PVA will work too.
After that, it is time to add some details. I glued some small rocks and two pieces of wood to the terrain piece. To add more structure and to fill all the small gaps use some filler. It will take a while to dry, but it is worth the hassle.
Now apply some watered down PVA and some sand to the piece. Make sure to scatter the sand over the piece to receive a more natural look. Besides that, it is time to glue the meerkat miniatures into place. Afterwards, call it a day and let the whole piece dry up.
In the next step, paint the whole piece with brown acrylic paint from the DIY store. Mix some PVA into the paint to coat the whole piece. It will take hours for the piece to dry, but it will be much more durable. You can paint the stones in the same step, using Model Color Basalt Grey (869). In this case, I personally do not mix PVA into the paint. 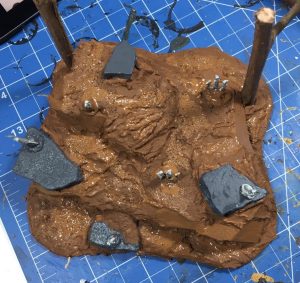
After some hours, apply a harsh dry brush to the earth using Model Color Pale Sand (837). Apply a more gentle dry brush to the stones using a lighter grey. Unfortunately, I can’t remember which one I used. But honestly, any lighter grey will work.
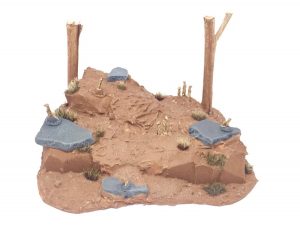
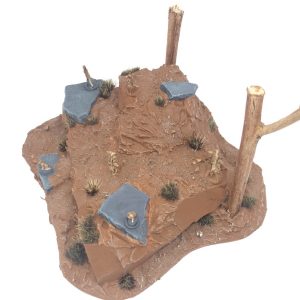
Your terrain piece is now almost ready for the table. To add some more variation apply some grass tufts. The ones I used are MiniNatur Wüstenbüschel, which is a German product line with desert style tufts. That’s it, you built a new piece of scenery for your table.
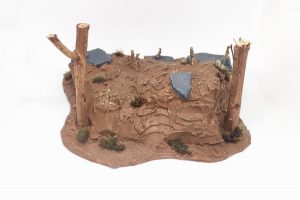
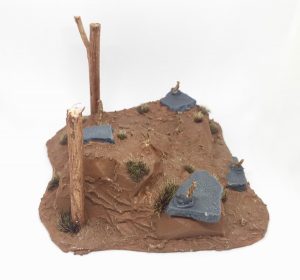
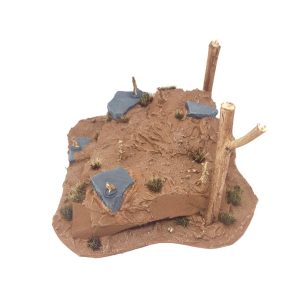
The finished piece
I hope you enjoy this tutorial and maybe it could be useful to you. If you have questions or suggestions, let me know in the comments.


Oh well done Davy, this looks great and I love the meerkats from Reaper. Thank you also for the link back.
Thanks Michael.
A great scenic piece which could be a fun scenario objective. I love to see something different than the standard bill’s and such and this is a prime example on what a bit of imagination can do. Very well done!
Thanks for the kind words. Highly appreciate it. I can strongly agree. A bit of imagination can bring our hobby to a whole new level.